Orwell Astronomical Society (Ipswich)
Review of the Celestron Nexstar 8SE
I borrowed OASI's Celestron NexStar 8SE telescope in anticipation of using it to observe the grazing occultation of 87 Ceti by the Moon early on 20 September 2016. Two evenings before the night of the graze, I practiced using the instrument. (Unfortunately, the graze itself went unobserved by members of the society because of poor weather conditions.)
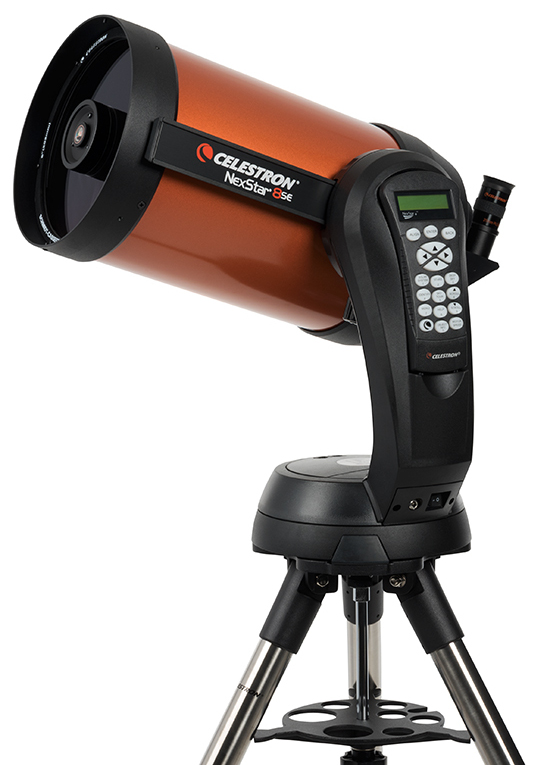
The optical tube has a 200 mm mirror with a focal length of 2032 mm but, because of the Schmidt-Cassegrain configuration, it is remarkably compact. It is easy enough to detach from the mount and carry around. Getting the rest of the apparatus downstairs from the Observatory, it soon became evident that the handset was located on the mount only with the assistance of gravity! Taping the handset into position enabled transportation of the tripod and mount together. Once downstairs, the whole instrument easily fitted into the boot of my car.
Once I had taken the instrument home, I downloaded the manual from the Celestron website. It has 52 pages, but only about 20 of these relate to use of the telescope. And several can be ignored, as the polar alignment wedge is absent – OASI possesses a strictly alt-azimuth "go to" telescope. The manual advises to level the top of the tripod, then to attach the mount; in fact, this approach is not necessary and a spirit level can be used to align the tripod and mount together. Be sure to attach the optical tube the right way up, ensuring that the focusing knob is at the bottom. This may seem obvious, but the current location of the finder-scope is confusing: the obvious position for it is occupied by a large lug which can be used with a StarSense camera (see below). As a result, the finder-scope is inconveniently low down. The optical tube needs to be clamped near its rear end, otherwise it will foul the base of the mount when observing near the zenith.
I aligned the finder-scope in daylight. You need to be looking precisely down the middle of it to see the red laser dot when it is turned on. The finder-scope has no magnification, and can be used with both eyes open. Two control screws enable adjustment of the alignment of the finder-scope in two orthogonal directions (not in alt-azimuth as the manual implies). It is easy enough to line up the red spot with the view at the centre of the eyepiece.
In retrospect, I should also have spent more time in daylight gaining familiarity with the handset. It is useful to know how to control the slew rate, and much of the alignment process can be rehearsed beforehand, even without the optical tube fitted.
I first tried setting up using the "three-star align" mode, where you point and click on any three bright and widely-separated stars. To avoid kneeling in the dirt, I used stars with an altitude less than 30°. After the third star was aligned, the handset crunched numbers for a while, and then pronounced Match Confirmed. It had identified the stars used, worked out its own orientation, and started tracking the movement of the night sky. (However, note that the alt-azimuth mount causes the field of view to rotate slowly, so is not suitable for long-exposure astrophotography.)
Then it was time to try the "go to" feature, which is what this kind of telescope is all about. I was able very easily to slew to the Moon, Albireo (near the zenith, so a nightmare to point at by eye), and Uranus. The subjects were not central in my 63x eyepiece but, considering I had entered my location as London rather than Ipswich, I was impressed. (Despite what the manual says, you do not see your location when you start the alignment procedure, but are sent straight to entering the time. To see your specified location, and change it if you want to, you have to use the "back" button immediately.)
Several days later, I tried "one-star align" from the balcony of the Observatory. I point-aligned on Altair and then did a "go to" for Vega. Unfortunately, the scope missed by about a third of the field of view of the finderscope. However, this may not have been a fair test, as I could easily have been half a minute out with the time entry.
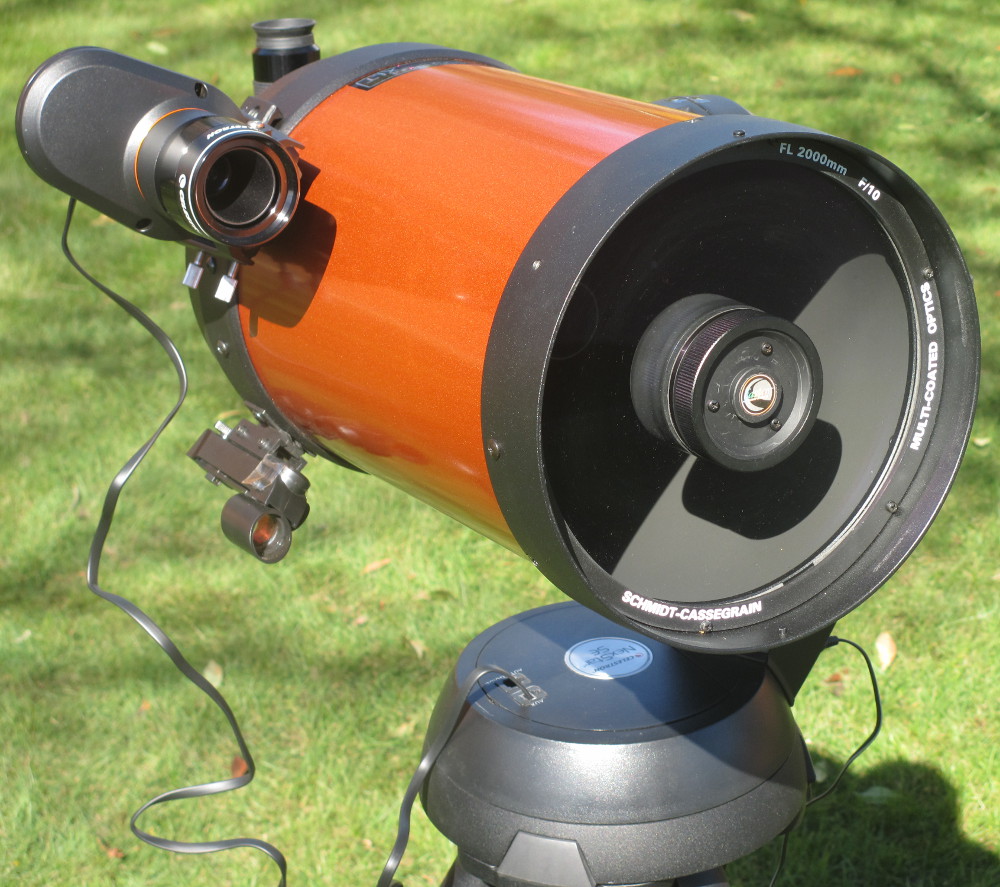
I was sufficiently encouraged by my practical experience of the telescope to try the StarSense facility. This has a camera which clips onto the side of the optical tube and connects to the "aux" socket on the mount. (See photo to right.) A different version of the hand control is also required. Once the telescope has been through a first time only set-up ("calibrate centre"), the alignment process becomes entirely automated as follows.
Position the telescope with a reasonably unobstructed view of the night sky and confirm that the tripod is level. Start the auto-align. The telescope moves around of its own accord, and the StarSense camera scans the night sky as if it were the telescope’s eyes. After about two minutes of apparently demented movements the telescope is aligned, and ready to accept "go to" instructions from the hand control.
The camera cannot be assumed to point in precisely the same direction as the centre line of the optical tube, and a first-time set-up process, "calibrate centre", deals with this eventuality. Essentially, you go through the auto-align process, and then use the hand control to select and "go to" a suitable guide star. Based on the information the camera has just collected, the telescope will move until the camera considers itself to be pointing directly at the chosen star. The telescope, however, will generally be pointing somewhere very slightly different. To calibrate, you look through the eyepiece and use the hand control to edge the telescope to a position where it exactly centres the guide star. You can fine-tune by switching to a higher magnification eyepiece. Pressing "Align" on the hand control makes the camera image the sky once again, and work out the offset. The telescope will indicate "Solution found". You can then accept the offset by pressing "Enter". Perform another auto-align as confirmation, and the job should be done.
You can change the telescope back to conventional use by swapping to the standard hand control, and disconnecting the StarSense camera. Even if you completely detach the camera from the telescope, it is claimed that you can revert to StarSense very easily. The physical registration the camera has with the optical tube when it is reattached is claimed to be sufficiently robust for recalibration not to be necessary. Just remember to swap back the hand control as well.
In my first session I used 32 mm and 15 mm eyepieces to execute a "calibrate centre" with Capella. After the confirmatory auto-align, I tried the "go to" for Aldebaran, M42 (trapezium), M31, and Uranus, using the higher magnification eyepiece, 15 mm (133x). All objects were reasonably well centred in the field of view.
In my second session, over three months later, I performed the auto-align, but forgot to remove the cap from the camera! (The camera can be "blinded" permanently by the Sun, so the cap is important.) I soon noticed my mistake, but left the system to get on with things to see what would happen. The telescope waved around for about four minutes before I put it out of its agony. When I removed the cap and auto-aligned again I noticed that the "calibrate centre" from the first session had not been preserved. "Go to" was able to locate Arcturus and Jupiter in the lower magnification eyepiece, but they were out of field with a higher magnification eyepiece (this time, 12 mm, 167x). The reason for the failure was unclear. Anyway, I had to do "calibrate centre" again.
I had carefully set up the time of day at the beginning of the session, to enable "go to" for the planets. When I saw that Jupiter was the only planet to appear in the list on the hand control, I thought at first that there must have been a problem. Then I realised that things were as they should be, as only Jupiter was visible at the time in question! I did some provocative tests, auto-aligning after each one, to see how the system coped. The tests were:
Although one auto-align completely failed on its first attempt, and another was obviously incomplete because Arcturus (visible at the time) failed to appear in the list of stars on the hand control, one repeat of the auto-align was enough to get the "go to" working satisfactorily. The "calibrate centre" correction was always preserved. I tried "go to" with many objects, and the results in the high magnification eyepiece were good, but not always bang in the centre. This is probably attributable to the mechanical backlash in the mount. The user manual explains some features and techniques which can mitigate backlash, but I did not explore them. My location for the sessions had quite limited horizons, and the seeing conditions for the second session were not as good as for the first. This may have led to the occasional auto-align failures that I saw. By and large, though, the StarSense facility is impressive.
For someone thinking of purchasing their own telescope, there is an interesting discussion of the 8SE versus the smaller 5SE at https://www.youtube.com/watch?v=f7uURzPRiuI. For lunar and planetary observing, where the difference in light-gathering is not so important, the 5SE is claimed to perform just as well as the larger instrument.
Joe Startin